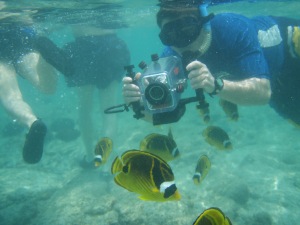
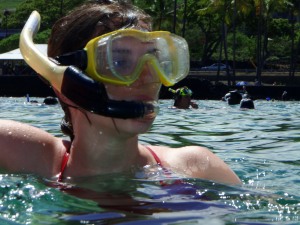
Saturday, May 30, 2009

Hawaii Island Snorkeling Tips Part VI: Wilderness Beaches of the Big Island!

Part I of this series discuses Snorkeling Gear; Part II of this series covers Snorkeling Technique; Part III covers Snorkeling Etiquette; Part IV discusses Snorkeling Safety and Part V covers Big Island Snorkel Spots.

Waialea Beach in Kohala is the gateway to many small, secluded secret beaches on the Big Island...but why go any farther than this?  It's perfect! Photo by Donnie MacGowan
Waialea Beach in Kohala is the gateway to many small, secluded secret beaches on the Big Island...but why go any farther than this? It's perfect! Photo by Donnie MacGowan

Of all the Hawaiian Islands, because it is the youngest, the Big Island has the fewest and smallest beaches…this leads to crowding during the height of tourist season at some beaches. Because Hawaii is still rural, there are still some wilderness (hike-to-only) beaches; a few of them are among the best on the island.

Many wild beaches may be camped upon but you must apply for a permit from the appropriate agency. Overnight camping on Hawaii beaches is simplified because of the mild climate--usually I take a few quarts of water, a couple sandwiches, my camera, dry clothes for post-snorkeling comfort, a fleece blanket and rice mat to sleep on (a beach towel will suffice) and a small tarp on the off-chance it rains. The key here is that if the weather turns truly ugly, you are rarely more than an hour from your car. You may wish to bring a few extra quarts of water to rinse the salt off after swimming—it’s difficult to sleep comfortably with salty skin.

Two things to bear in mind—although is sometimes doesn’t seem it, Hawaii DOES have tides…camp well back of the beach area. Secondly, beach fires are not only illegal, they are hugely dangerous on most beaches on the west side.

Ke-awa-iki Beach (park off Highway 19 just north of Mile 79; walk along gravel road towards the ocean to a fence and foot trail; about 15 minutes to beach): A little walking over a lava road and a’a rewards you with a beautiful beach many locals don’t know about. This tiny black-sand beach has good snorkeling on the south side, where there is still a pocket of white sand. This unique black and white sand beach was created after the 1859 eruption of Mauna Loa, when lava reached the north end of the beach, where the black sand is today. Further south along the beach, the recent black sand has not had time to thoroughly mix with the pre-existing white sand.

If one continues south there are numerous tide pools to explore.

Hiking north, one comes to Pueo Bay, where freshwater springs make the snorkeling interesting but weird, with large temperature and salinity gradients. If one takes the trail heading inland towards a conspicuous growth of hala trees, one comes to a pair of lovely golden pools. A golden algae gives these pools their distinctive color, but be sure not to damage the growth by walking on it. Finish the trek by hiking back across the a’a…approximately 4 miles, round trip.

Photo by Donald MacGowan
Makalawena Beach on the Big Island is the epitome of Hawaiian white sand beaches...and it's always uncrowded: Photo by Donald MacGowan

Makalawena Beach (turn off Highway 19 south of Mile 90 at Kekahakai State Park; at the end of the road, take obvious trail north over lava field; the trail traverses rough lava and keawe breaks, so shoes are required): Makalawena is the finest swimming and snorkeling beach on the island and the most beautiful beach setting. This beach sports a series of coves, refreshing shade, big sand dunes and a nice freshwater pond to rinse-off in. A great backpacking getaway, a one-way through hike along the Ala Ali'i trail from Kekahakai State Park, past Makalawena to Kual Bay is a fabulous trip. Do not forget your camera; this hike will be a major highlight of your trip to the Big Island.

The land fronting the beach is owned by Bishop Estate and is slated to be turned into a development of condos and resorts; vigilance and protest on the part of locals and visitors is the only way we can keep this last, wild Kona beach wild.

Pawai Bay (in Kailua Kona, drive to the end of the Old Airport County Beach Park; hike along the ocean to the first, obvious, sandy bay): Spectacular, secluded, secret; Pawai Bay is perhaps the most interesting snorkeling spot on the island. Walk along the sea cliffs and coves about 15-20 minutes north, to the Queen Liliuokalani Children’s Camp at Pawai Bay. Remember, non-Hawaiians are restricted to travel along the tidal zone and only the edge of the shoreline…to venture even a few feet inland is trespassing. The ever-watchful security guards will remind you of this. Repeatedly.

Pawai Bay hosts a choice sandy beach with a small channel leading to open ocean and exciting snorkeling. Many charter snorkel tours bring clients here, but you can visit free by making the short hike in. Submerged caverns, arches and caves are filled with fish and coral and pristine water. From the shore, this is not a snorkel adventure for rank beginners.

Swim through the sandy bay to the channel and out to the cliffs. Be wary of surginess and don’t go in when the surf is big. Once in the larger bay, look back toward shore where numerous small channels lead shoreward but dead-end in cliffs; your passage back is the only channel through which you can see sand at the end. Remember this when trying to get back into the little bay.

The bay itself lies on Queen Liliuokalani Trust lands. Non-native Hawai’ians are not allowed on the land or to use the facilities. State beach access laws allow you to visit as long as you stay immediately along the shoreline; the beach is patrolled 24/7.

Kealakekua Bay from the Captain Cook Monument. Simply the finest snorkeling.  Ever.  Photo by Donald MacGowan
Kealakekua Bay from the Captain Cook Monument. Simply the finest snorkeling. Ever. Photo by Donald MacGowan

Captain Cook Monument (The trail leaves the Napo’opo’o Road right at telephone pole number 4, just 500 feet below where it drops off Highway 11; parking is tight, but safe): This hike is a fine walk through tall grass, open lava fields and dryland forest, opening onto one of the most pristine ocean beaches in the world. Hiking down to the Monument is great fun—the return is hot, thirsty and strenuous but rewards you with panoramic views of the coast. The 2.5-mile hike takes about an hour down, somewhat more to return. The trail runs straight down the left side of a rock wall toward the sea. As the pitch straightens out, keep to the left at the fork and proceed to the beach through the abandoned village. You strike shore several hundred feet northwest of the monument—remember to bear right at the trail junction when returning, or you face a long and unpleasant time wandering the a’a fields.

Snorkeling at the monument is wild and scenic, from shallow tidepools north of the wharf to the steep drop-off under the cliffs. There is a concrete marker in the tidal zone denoting the exact spot Cook fell somewhat north of the actual monument.

Honomalino Beach (turn off Highway 11 just south of mile marker 89, drive through Miloli’i; start hiking between the county park and a yellow church. Keep along the right at forks in the trail, in and out of the surf line, to avoid private property): A true gem of West Hawai’i and rarely crowded, Honomalino Bay is reached by a 20 minute hike from the south end of Miloli’i Beach County Park. Snorkeling is very interesting on the north side in the rocks, when the surf is low. The water, though very clear, is sometimes quite cold due to spring discharge in the sand on the beach.

Photo by Donnie MacGowan
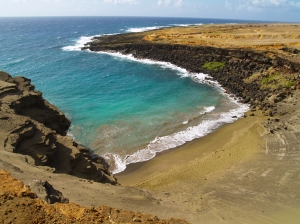
Mahana Green Sand Beach at South point on the Big Island: Photo by Donnie MacGowan

Mahana Green Sand Beach (Turn off Highway 11 to South Point, follow signs to Mahana Boat Launch. Park just above the boat ramp for the 2 1/4 mile hike to the Green Sand Beach): Absolutely unique to Hawai’i, beautiful and strange, are the green sand. The green sand beach at South Point is the best known, largest and most accessible of these. The sand grains here are olivine crystals, washed out of a cinder cone that has been partially breached by the sea.

When you reach the end of the trail, you are a hundred or so feet above the beach on the rim of the remnant of the crater. At the start, there is a tricky spot edging over a 3-foot ledge, but below this the trail is wide and clear One can also easily scramble down middle of the cone, but this can be slippery. Although tricky to spot on the way down, from the beach looking up the way back to the crater rim is easy to follow.

The beach lies in the interior of the cone, and the protected cove makes for a wonderful swimming/snorkeling spot but be wary of currents. Do not go out far, nor in at all in high surf or strong winds. The bizarre color of the water shrieks for color photographs, particularly underwater photographs taken while snorkeling.

A video covering many of these topics is available here.

For more information about visiting and touring Hawaii in general, and exploring the fabulous snorkeling on the Big Island in particular, please visit http://www.tourguidehawaii.com and www.lovingthebigisland.wordpress.com. For information about the author, go here.

All media copyright 2009 by Donald B. MacGowan

Thursday, May 28, 2009

Hawaii Island Snorkeling Tips, Part V: Best Snorkeling Beaches of the Big Island

By Donnie MacGowan

Coming to my island for a vacation? There are three things I always recommend the first-time visitor do. First, go on an air tour. Secondly--go to a luau. Finally, I advise people of every age to get in the water and go snorkeling. The "one-one-one, experiencing the world through the fishes' eyes" magic of swimming in those bath-warm lagoons surrounded by clouds of tropical fish is an amazing, restful and restorative pursuit-you will find your mind going back to that experience over and over through the years much more so than many of your other travel experiences. Part I of this series discuses Snorkeling Gear; Part II of this series discusses Snorkeling Technique and Part III covers Snorkeling Etiquette; Part IV of the series covers Snorkeling Safety and Part V discusses Big Island Snorkel Spots and Part VI discusses Wilderness Snorkeling on the Big Island.

Let’s Chat About Snorkeling, Part V: Hawaii’s Best Snorkeling Beaches

Photo by Donnie MacGowan
Liz Maus Snorkeling at Honaunau: Photo by Donnie MacGowan

Hawaii’s varied landscape and dynamic shoreline provides for an amazing array of snorkeling experiences, from broad, sandy beaches with placid and inviting turquoise water to broken glass-sharp cliffs where the swimmer leaps into surgey dark water. Everywhere I’ve snorkeled on Hawaii, from lazily paddling in calm waters at Kahalu'u to rappelling into the wild surf and open ocean currents at Pau'ekolu, the snorkeling is wonderful, beautiful, exhilarating. But many of the best places to snorkel are difficult or scary for the beginning snorkeler, some could be lethal. Here's a list of the crown jewel snorkeling spots that are easy for the beginner, tantalizingly fascinating for the experienced.

Westside Beaches:

Hapuna Beach (turn off Highway 19 at mile marker 69): Always rated in the Top 10 of American beaches, Hapuna Beach is long, wide and phenomenally sandy. The center of the beach is tailor-made for wave play and boogie boarding, the north and south coves are quieter, better for snorkeling or gentle floating. Although most of the shore is relatively free of currents, only experienced snorkelers who are strong swimmers will want to snorkel around the south end of Hapuna, past a sea arch and to the reef and cove of Beach 69—a long, but rewarding swim with some of the most incredible underwater vistas available to the snorkeler in the word.

Anaeho'omalu Beach (turn off Highway 19 at mile marker 76): The most photographed sunset view on the Island of Hawai’i, Anaeho’omalu Bay is the icon of what most visitors envision Hawai’i to be like before they get here. Although the water tends toward being cloudy, this is an excellent beach for beginning snorkelers.

Kekahakai State Park, Kua Bay (turn off Highway 19, between mile markers 88 and 89): Kua Bay has a lovely white sand beach and full facilities although there is no shade to speak of. Swimming and boogie boarding in the crystalline waters is primo, though strong currents and large waves call for respect, here; if the surf is up, don’t go in. Also, sometime in winter, the surf removes the sand to offshore, leaving a rocky shelf that is less fun to frolic on than the sandy beach.

Photo by Donnie MacGowan
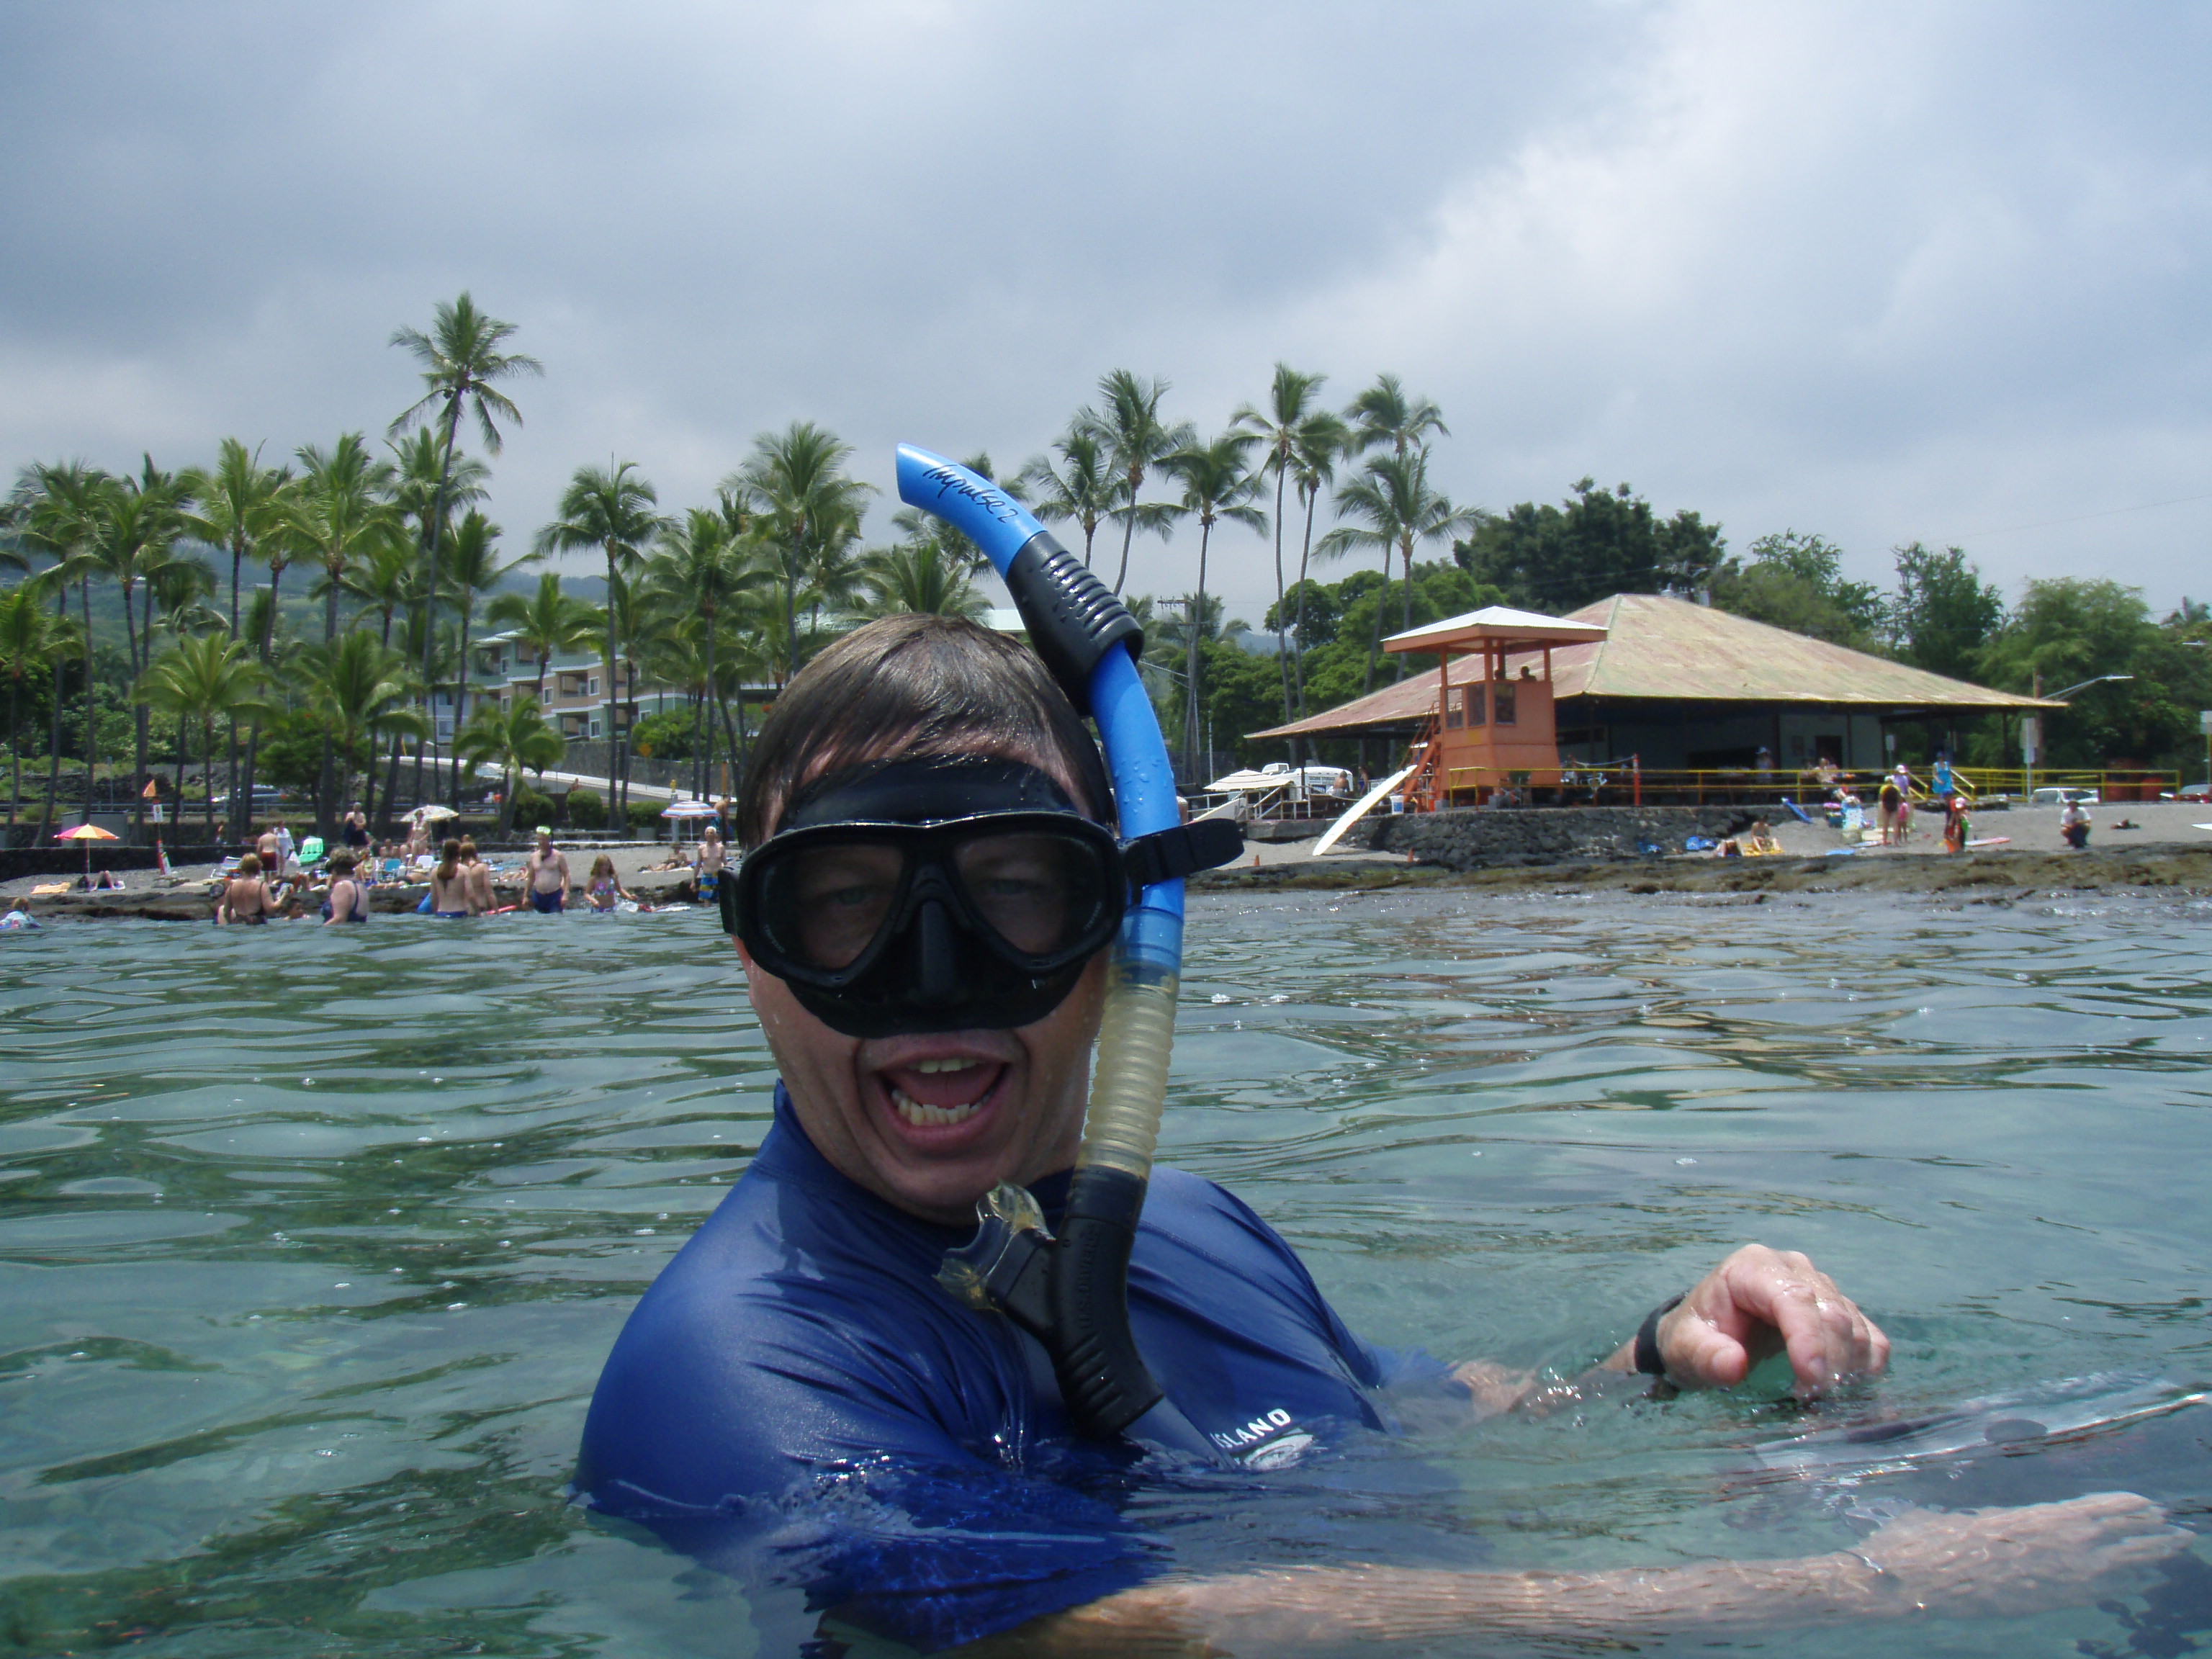
Bart Hunt Snorkeling at Kahalu'u Bay: Photo by Donnie MacGowan

Kahalu'u Beach (in Kailua Kona, along Ali'i Drive, between mile markers 4.5 and 5): This is the premiere snorkeling beach of the Island of Hawai'i; protected from the open sea by a jetty, the reef is also protected against commercial aquarium fishing. Thus, the snorkeling is in calm, shallow water. Also, there is an abundance of fish of an enormous variety...perhaps the best display on the island. Numerous freshwater springs and shallow water bathers make the near-shore snorkeling unpleasantly cloudy, but about 50 feet offshore the water turns crystal clear and the display of coral is nothing short of amazing. There is a fair current north out of the bay and along the coast. Incredible archeological sites abound in this area and make a fine after-snorkel exploration on foot; ask for details at the concierge desk at the adjacent Keauhou Beach Resort.

Two-Step Beach (adjacent to Pu'u Honua O Honaunau National Historic Park on Highway 160): Some of the finest, protected snorkeling on the Island is located at Two-Step Beach. A wonderland of turtles, coral and fish, with frequent morning visits by dolphins, this snorkeling experience shouldn’t be missed. No swimming is allowed within the Park out of respect for its sacredness; however, Two-Step Beach offers a convenient place to enter Honaunau bay. One can enter the bay either by the boat ramp, or by stepping off the short cliff into the water from near the center edge of the lava beach, where two ledges serve as steps down into the ocean. Getting in is a simple matter of stepping down these steps, "1-2-OCEAN!”--to get out, reverse the process.

Ho'okena Beach (turn off Highway 11 near mile marker 102): Brilliant snorkeling, decent boogie boarding, passable shell collecting and wonderful camping—it’s a wonder the large and warm stretch of sand at Ho’okena Beach is not more popular with visitors. Frequented by dolphin, stuffed full of pelagic and reef fish and turtles and boasting crystal clear, warm and calm waters, Ho’okena is a must-visit beach for avid snorkelers.

Southside Beaches:

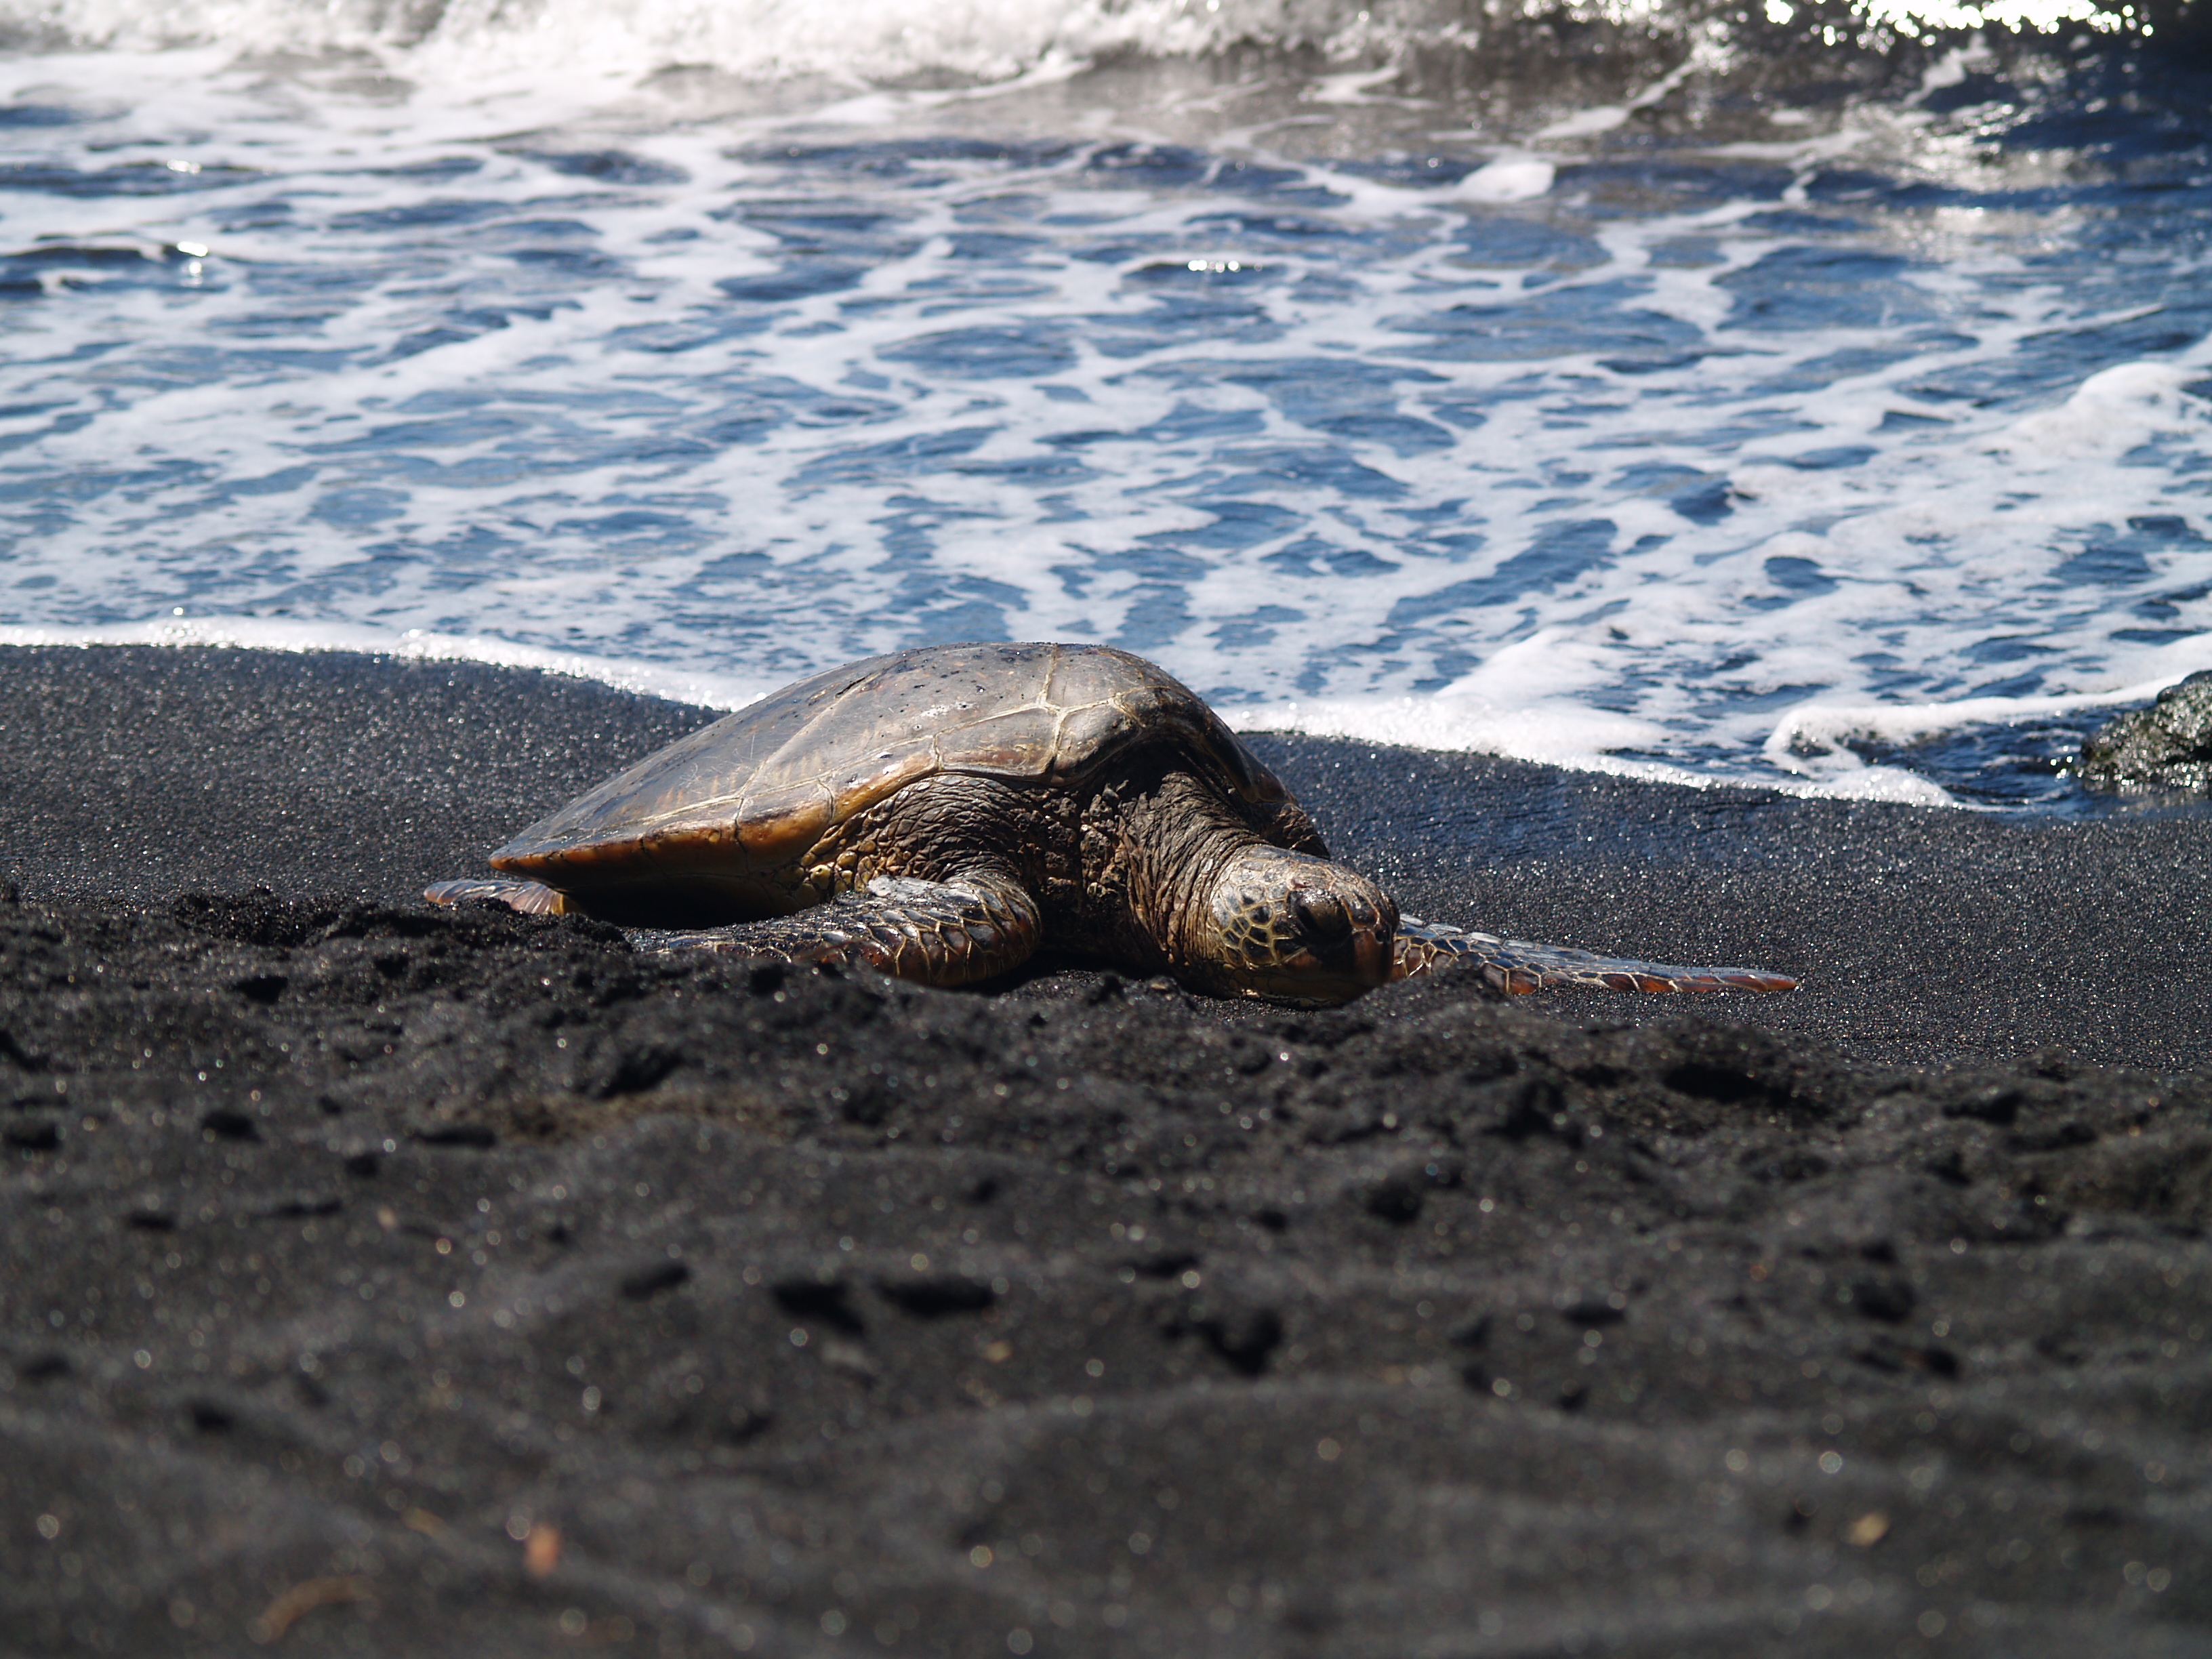
Punalu'u Beach (turn off Highway 11 between mile markers 55 and 56): A truly remarkable place of great peace, beauty and spiritual healing, Punalu’u’s black sand-lined coves and beaches are world-renowned. With dozens of endangered Hawai’ian Green Sea Turtles and superabundant abundant fish, this is a truly snorkeling experience--made unique because of the black sand bottom of the bay. Due to chilly waters, off-shore winds, strong currents and a fearsome rip, swimmers and snorkelers should use caution when swimming at Punalu’u, but it’s hard to resist getting in and swimming with all those turtles. There are abundant Hawaiian cultural sites in the park that are worth visiting.

Photo by Bradford T. MacGowan
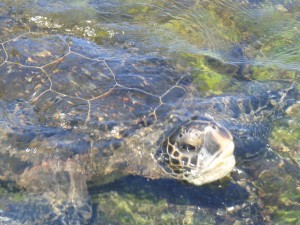
Hawaiian Green Sea Turtle Basks in the Sun at Punalu'u Beach: Photo by Bradford T. MacGowan

Kehena Beach (on Highway 137 near mile marker 19): A quick scramble down the bank on a dirt path quickly brings you to the Kehena Black Sand Beach. Once on the beach the first thing that may strike you is that many of the locals who frequent this park have forgotten to put on proper beach attire…or any other attire whatsoever, for that matter. In the shade of palms and ironwood this wonderful beach is generally sunny even when the rest of Puna is rainy. Swimming here is great near-shore, but ocean currents are strong and dangerous not far from shore. The locals are friendly but frisky, so don’t leave valuables in your car.

Pohoiki Bay at Isaac Hale Beach Park (on Highway 137 between mile markers 11 and 12): A lovely black sand beach with an expert surf break, Isaac Hale Beach Park is one of the very few real beaches and boat ramps in Puna District; as such this park sees a lot of traffic. It is also the site of the best surfing and some of the wildest snorkeling and scuba diving in Puna.

A short path along the shoreline leads from the parking lot, past a house with abundant “No Trespassing” signs, just a few minutes stroll then turns about 20 yards into the jungle to a secluded, perfectly lovely, natural hot spring that is wonderful for soaking. Locals usually don’t bother with swimwear here; you shouldn’t feel required to, either.

Kapoho Tidepools (turn off Highway 137 and head east on Kapoho-Kai Road, left on Kaheka and right on Waiopae): Stuffed with abundant sea life, this sprawling basin of lava tidal pools is a remarkable treasure for snorkelers of all abilities from the starkly frightened to the seasoned veteran. Moorish idols, yellow tangs, various wrasses and eels, sea urchins and sea cucumbers abound and there are even some nice corals in the deeper pools. The largest pool is called “Wai Opae”, which means “fresh water shrimp”.

Keeping to the left of the main channel keeps one away from most of the ocean currents, which can be surprisingly strong, even in small channels, where ponds empty into the ocean. No real facilities exist here beyond the parking lot, so come prepared.

Eastside Beaches:

Richardson Beach Park (Take Kalaniana'ole Street 3.6 miles east from the intersection of Highways 19 and 11 in Hilo): The almost universal experience of visitors to Hawai’i is that, although it is certainly beautiful and unique, no matter what pre-conceptions a traveler may bring about Hawai'i, their experience is a bit different to what they expected. Richardson Beach Park, with its towering palms, fresh water pools, delightful surf, secluded and calm tidepools and general ambience of tropical paradise, is almost certainly very close to what most visitors expect from Hawai’i—hence it popularity. The snorkeling here along the small black sand beach is the best of the Hilo area.

Frequented by dolphins and sea turtles, the near-shore water is a little cold when getting in, due to fresh water springs, but soon warms-up a few dozen yards from shore. The currents and surf can occasionally be tricky here, so heads-up, pay attention to advice from the lifeguards.

Be sure to watch for Part VI which talks about snorkeling the wilderness beaches of the Island of Hawaii.

A short video discussing many of these topics can be found here.

For more information about visiting and touring Hawaii in general, and exploring the fabulous snorkeling on the Big Island in particular, visit http://www.tourguidehawaii.com and www.lovingthebigisland.wordpress.com. For information about the author, go here.

All media copoyright 2009 by Donald B. MacGowan

Tuesday, May 26, 2009

Hawaii Island Snorkeling Tips, Part IV: Snorkeling Safety

By Donnie MacGowan

Coming to my island for a vacation? There are three things I always recommend the first-time visitor do. First, go on an air tour. Secondly--go to a luau. Finally, I advise people of every age to get in the water and go snorkeling. The "one-one-one, experiencing the world through the fishes' eyes" magic of swimming in those bath-warm lagoons surrounded by clouds of tropical fish is an amazing, restful and restorative pursuit-you will find your mind going back to that experience over and over through the years much more so than many of your other travel experiences. Part I of this series discuses Snorkeling Gear; Part II of this series will discuss Snorkeling Technique and Part III will cover Snorkeling Etiquette; Part IV of the series covers Snorkeling Safety and Part V will cover Big Island Snorkel Spots.

Photo by Donald MacGowan
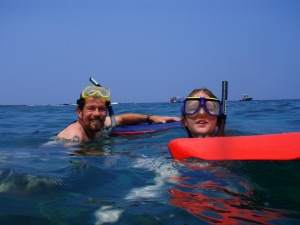
Bradford MacGowan Snorkeling at Pu'u Honua O Hounaunau: Photo by Donald MacGowan

We've covered snorkeling gear and technique...before we go any farther, let's talk a minute about snorkeling safety.

First and foremost, as with all ocean sports, never turn your back on the ocean. Just as important, never snorkel alone; never get more than 20 feet from your partner. Before getting in the ocean, memorize the color of your partner's mask and snorkel…this is how you will recognize him from a distance in the water. Listen to advice from the lifeguards, obey posted warnings, always pay attention to the currents, surf conditions and surges over rocks.

Plan your points of entry and exit before you get wet; try to enter and exit from sandy areas with little of no surf. You and your partner should agree on a plan about where you are getting in and getting out of the water, what part of the bay you are going to explore and how long you plan to be out. Don't overestimate your abilities, plan conservatively, err on the side of safety. Don't change this plan, once you are in the water, except to make it shorter and more safe.

Don't confront incoming waves head-on, don't try to jump over them and don't turn your back on them; duck under incoming waves before they reach you. Watch the local kids on boogie boards...see how they duck the waves? You do that, too.

Never snorkel on windy days. Offshore winds may take you unexpectedly out to sea or make it hard to swim back in and onshore breezes stack extra water, high on the beach, making nasty rip-currents as it flows back into the ocean. Onshore breezes also bring in jelly fish and man-o-war.

If you are caught in a current, don't panic; don't swim against the current but rather swim diagonally across it toward shore. Keep going, you'll make it.

Poke your head out of the water frequently to check that your partner is within 20 feet of you and to keep yourself oriented relative to your entry and exit places. Stay alert--it's easy to loose track of time, get carried farther than you thought by a current you didn't even notice, wander out of your comfort zone, lazily paddle away from your partner, accidentally stray into a dangerous zone. I cannot stress this enough--it's easy to get overtired; get your partner and swim in BEFORE you feel fatigued, thirsty, sunburned; BEFORE the wind comes up or the surf builds. So stay focused, stay oriented, always know where you are, where your partner is.

Photo by Donnie MacGowan

Lee Ann MacGruder Snorkels the shallows at Ho'okena Beach: Photo by Donnie MacGowan

Sunscreen washing off your body pollutes the water and is a major factor in coral death--wear a t-shirt and baseball cap to avoid sunburn while in the water, waiting until you are out of the ocean and rinsed off to apply sunscreen.

Many things in the ocean sting, most commonly sea urchins--avoid them, do not handle or step on them. White vinegar kills sea urchin stings from embedded spines and, regularly applied, helps to dissolve the spine. Other home remedies for sea urchin, jelly fish and other stings include the application of moistened tobacco, hydrogen peroxide or urine (this latter can be hard to self-administer and will quickly let you know who your real friends are). Like wasp stings, most stings from ocean creatures are not medically dangerous, merely a painful nuisance, but it's best to be prepared with whatever remedy you choose in your beach kit. Some jellyfish stings and all man-o-war stings are potentially life-threatening and need to be treated at the emergency department of the nearest hospital.

This shouldn't even need mentioning, but of course, if you've been drinking--even a little, you should not go snorkeling. Snorkeling is best done between about 9 a.m. and noon, anyway, so sobriety shouldn't even be an issue. Oh, right; you're on vacation--I forgot.

Don't forget to drink lots of water…immersion in salt water is very dehydrating and just swimming around you've worked harder--and sweated more--than you realize. Be kind to your skin and rinse yourself and your gear with fresh water immediately after you get out of the ocean and remember to apply sunscreen and wear your sunglasses. Don't overestimate your skin's tolerance for beach sun; a nasty sunburn is distressingly easy to acquire and will absolutely ruin your vacation. Now might be a good time to go inside and cool off, rest a bit--you are on vacation, you know?

Photo by Donald MacGowan
Bradford MacGowan Photographs a school of Humuhumuele'ele at Kahalu'u Beach: Photo by Donald MacGowan

That's a few of the gear technique and safety tips you should bear in mind...remember to heed whatever advice the lifeguards give you--they are seasoned professionals who intimately know their beach; obey posted rules and be wary of riptides and currents. Most of all, spring for a cheap-o $10 disposable underwater camera, get in the water and enjoy...those fish won't photograph themselves, you know!

A video covering many of these topics is available here.

For more information about visiting and touring Hawaii in general, and exploring the fabulous snorkeling on the Big Island in particular, visit http://www.tourguidehawaii.com and www.lovingthebigisland.wordpress.com - a short video about snorkeling in Hawaii is available here. To see a funny video of my family learning to snorkel in Hawaii, go here. For information about the author, go here.

All media copyright 2009 by Donald B. MacGowan.

Sunday, May 24, 2009

Rodeo to Rock and Roll--A Brief History of Ranching in Hawaii

Few Mainlanders Realize that Three Generations of Cowboys Lived, Worked and Died in Hawaii Before Ever White Men Brought Cattle to Wyoming and Montana: Photo by Carol Gilliland

By Donnie MacGowan

The cattle industry in Hawaii began on February 22, 1793, at Kealakekua Bay on the Big Island. British Navigator George Vancouver presented to Kamehameha I four cows, two ewes and a ram he had brought from Monterrey, Mexico. In January of 1794, Vancouver landed many more cattle at Kealakekua and formally requested a kapu against killing them.

Kamehameha ordered the first cattle pen in Hawai’i to be built at Lehu’ula. Still in use today, the paddock enclosed over 400 acres. However, many of the cattle ran wild, and with the kapu against killing feral cattle in place, the wild herds became enormous and unmanageable.

Archibald Menzies, Vancouver's ship surgeon, wrote in his diary in 1793: “When they [the cattle] stampeded, they ran up and down the country to the no small dread and terror of the natives who fled from them with the utmost speed in every direction.”

Cows Graze the Upper Slopes of Kohala Mountain: Photo by Donald B. MacGowan

For over thirty years the kapu against killing wild cattle was in force and the rapidly growing wild herds destroyed farmland, ate crops, often stampeded through villages destroying homes and claiming numerous lives. June 21, 1804, the first horse and mare were landed on the Kona side of the Island of Hawaii, and the days of the free ranging cattle were coming to a close as the number of mounted men increased and they began to coral and tame the wild herds.

Kamehameha lifted the kapu on killing wild cattle in 1830; the rapid increase in whaling ship traffic about this time had caused a great rise in demand for fresh and salt beef. And soon the wild herds were being thinned to meet this demand.

Unused to herding large, unruly beasts, initially the Hawaiians simply dug deep pits, similar to “tiger traps” and stampeded the cows past them, hoping to catch a few. This was not only inefficient, it had unintended consequences, as well. In 1834, Sir David Douglas, the Scots botanist for whom the Douglas Fir is named, died in one of these pits. Whether killed by the fall, killed by the bull that later fell on top of him, or was murdered by the Englishman Edward Gurney (bull hunter and escaped convict) for his gold is not known. A monument to Douglas has been erected at the site of his death, Kaluakauka, off Mauna Road on the slopes of Mauna Kea.

Here, the history of Hawaiian ranching introduces one of its more colorful characters, John Parker, founder of Parker Ranch, which is still today the largest cattle ranch in America wholly under private ownership. Parker's story in Hawaii starts back a bit in 1809 when as a 19-year old sailor, he jumped ship on the Island of Hawai’i.

Coming to the attention of King Kamehameha the Great, Parker was trusted with many organizational tasks which the King believed would help him bring the Kingdom of Hawai’i into modern times. During the War of 1812, John Parker was allowed to go to China seeking adventure, fame and fortune, but returned to Hawai’i bearing many modern inventions to show the King, including the newest models of military muskets.

With his modern weaponry, Kamehameha gave John Parker the task of shooting many of the feral cattle rampaging the countryside. Parker taught the natives how to render the meat into salt beef which was then sold to the passing whaling and merchant ships and soon became Hawai’i’s number one export. For this, John Parker was given an initial grant of 2 acres land by the King. When he married Princess Kipikane in 1816, Kamehameha the Great’ granddaughter, she was granted some 640 acres…this is how the Parker Ranch began. Parker asked for lands surrounding the area the Hawaiians referred to as “Waimea”, which means “sloppy” or “muddy” in Hawaiian.

John Parker Knew the Lush Grasslands Around Waimea Were Perfect for Ranching: Photo by Donald B. MacGowan

There is some irony here, as the Hawaiians considered this land nearly worthless—cold and rainy, it was no good for producing traditional Hawai’ian food crops and uncomfortable for living in traditional Hawai’ian homes. However, Parker saw it was perfect for raising cattle. Much to the private mirth of the Hawaiians, he kept buying and adding land to his holdings until today; the ranch he started covers nearly 10% of the Island’s landmass, a whopping 150,000 acres.

At Parker's suggestion, Kamehameha recruited California Vaquero Joachin Armas to help contain the wild cattle and train local cowboys. As the years went by, more Spanish mission vaqueros from California came to work for the burgeoning cattle industry. They brought their trained horses, Spanish saddles, spurs, sombreros and Spanish traditions of cattle ranching, passing them on to the Hawai’ians they trained. They also trained the Hawaiian to work leather, jerk beef and cure hides. Soon, hides and tallow were a major Hawaiian export.

The Hawai’ians called the vaqueros “paniolos” the linguistic corruption of the Spanish word “Español”; which today remains the island word for “Cowboy”.

Early Hawaiian Cattle Brands: Photo by Donnie MacGowan

Cattle born on the Island of Hawaii were often shipped live to other islands and the mainland. In the early days, cows were simply run down into the surf, swum out to longboats and secured to the boat by lashing their horns to the gunwales, then rowed out to the waiting ship. In the late 1800s, piers and docks began to be built at various shipping spots around the island and the cows were unceremoniously hoisted by crane onto the deck of the waiting ships.

In recent years, due to fears of further ground-water contamination, laws against building new slaughterhouses were passed in Hawaii. In order to prepare the beef for retail sale, many cattle today are shipped live to the mainland for slaughter and butchering via ocean-going barge; others are loaded aboard converted, air-conditioned, 747s and flown live to California. I am not making this up.

Ranch culture by its nature is fairly isolated. As such, over the years this allowed the Paniolos to preserve many Hawaiian traditions, such as the art of Hula and the Hawaiian Language, which the missionaries actively tried to eradicate.

A direct benefit of this isolation and the cultural cross-pollination that is not immediately identified with the cattle industry was the advent of modern Hawaiian music. When the Mexican vaqueros moved to Hawaii, they also brought their guitars and their love of music. A deeply musical people themselves, the Hawaiians were intensely interested in these, the first stringed instruments they had ever seen up close. Fearing the Hawaiians would steal their guitars, the Mexicans would de-tune them after use, making it much more difficult for the curious Hawaiians to unlock their musical secrets. However the Hawaiians were more than clever musically and quickly learned to make their own tunings. Instead of the standard European tunings which require various fingerings to make chords, the Hawaiians worked out their own open chord tunings that more suited the key and style of their indigenous music. Called “slack key guitar” these unique tunings are one of the features that make the sound of Hawaiian music so distinct. The signature Hawaiian musical instrument, the ukulele, was actually introduced by Portuguese settlers. In Hawaiian, “ukulele” means “dancing flea”.

The modern connection to all of this is that without ranching and without the importation of Spanish vaqueros and their guitars, there would be no rock music. Don't believe me? Hawaiian slack-key guitar virtuosos invented the steel string guitar. Without steel string guitars, no electric guitars would ever have been possible. No electric guitars, no rock music. So next time you're rocking out with your MP3 player, take a moment and silently thank King Kamehameha the Great for his extreme foresightedness...

Hawaii ranches also produced some of the greatest cowboys of all time, the best remembered of whom is Ikua Purdy, winner of the 1908 World Roping Championship at Cheyenne Frontier's Day.

In 1907 the owner and manager of Pu`uwa`awa`a Ranch, Eben "Rawhide Ben" Low, attended Frontier Days in Cheyenne, Wyoming. Knowing his cowboys far excelled their mainland contemporaries, in 1908 he sent Jack Low, Archie Ka`au`a and Ikua Purdy (his brother, half brother and top hand) to compete in Cheyenne.

Statue of Hawaii's Most Famous Paniolo, Ikua Purdy, In Waimea: Photo by Donnie MacGowan

As colorful in their hats with flower lei and vaquero-style chaps as they were masterful in the competition, they took Frontier Days by surprise. Ikua Purdy won the steer-roping contest in 56 seconds, Archie Ka`au`a came in second and even though he had an asthma attack during the competition, Jack Low placed sixth. Eben Low always said Hawaiian cowboys were the world's finest because they dealt primarily with wild and feral cows. In 1999, Ikua Purdy became the first Hawaiian ever voted into the National Rodeo Cowboy Hall of Fame.

Cattle ranchers were also important to Hawaii’s contribution to the war effort during the Second World War. During the years 1943-1945 more than 50,000 marines of the 2nd and 5th Marine Divisions, Navy sailors and Army soldiers used Camp Tarawa, located almost entirely on the Parker Ranch, for rest and recuperation from the historic assault on Tarawa, as well as training for the assaults on Iwo Jima, Leyte and Guam and the occupation of the Japanese home island of Kyushu.

Visiting paniolo country on the island of Hawaii means traveling to Waimea town, snuggled deeply between Mauna Kea and Kohala Volcano. Sometimes startlingly sunny, sometimes shrouded in mist or rain, Waimea is also the scenic heart of the mountain country, which cries for exploration. From here one can take stunning Highway 250, the Kohala Mountain Road, an incredibly beautiful drive through upland pasture, meadow and forest to the old-time Hawaii town and artist community at Hawi.

Simply touring between Kona and Hilo through Waimea also is a wonderful trip from dryland forest through the upland lava flows and rolling grasslands of the Kohala-Mauna Kea Saddle and down again through eucalyptus forests to tropical jungle-filled canyons and the feral sugar cane fields of the Hamakua Coast.

Waimea Celebrates its Ranching Roots With The Cowboy Boot Statue: Photo by Donald B. MacGowan

Waimea offers some of the finest shopping, restaurants and the most modern hospital on the island. There are two large shopping centers, a fine art museum and "Restaurant Row", a street of eating establishments that rival any restaurants on the island. Although it seems a little rough and tumble and jeans and flannel shirts appear to be the uniform, Waimea is actually a very sophisticated town and an enjoyable place to visit.

For more information on visiting Hawaii in general or visiting the Big Island in particular, please also visit www.tourguidehawaii.com and www.lovingthebigisland.wordpress.com. Information on the author is available here.

All media copyright 2009 by Donald B. MacGowan (except where otherwise noted).
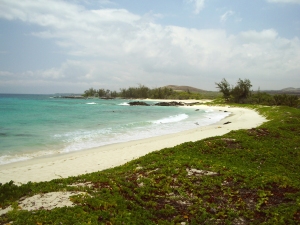
Friday, May 22, 2009

Packing for a Trip To Hawaii: What to Bring, How To Pack, More Advice Than You Need

What Do I Take When I Go To Hawaii?

The MacGowan Family Deplanes in Sunny Hawaii; You Want To BE sure You Have Everything You Need to Enjoy Your Vacation, but Not So Much You Have To Haul a Pile of Luggage: Photo by Donnie MacGowan
The MacGowan Family Deplanes in Sunny Hawaii; You Want To Be sure You Have Everything You Need to Enjoy Your Vacation, but Not So Much You Have To Haul a Pile of Luggage: Photo by Donnie MacGowan

Packing Your Bags for Hawaii: With airlines charging for a second--or even for the first--piece of luggage, and strict "50 pounds each" weight limits being enforced, the thrifty traveler is wise to plan ahead carefully, to avoid racking-up expensive fees. I used to travel by the motto "Don't check baggage unless you can afford to lose it; if you can afford to loose it, why did you bring it?"; thus I never traveled with anything more than carry-on. While it is always good to travel lightly, with the advent of stringent new carry-on limits and my advancing age (and concomitant increasing desire to travel in comfort) I have learned to travel with only one piece of checked baggage plus carry-on. The key is packing intelligently so you can pack less.

MacGowan Family and Luggage for 3 for a Fourteen Day Trip to Hawaii: Photo by Donald B. MacGowan

Be Smart About Your Carry On Baggage: Most airlines allow you to bring one carry-on bag and a personal item such as a purse or a lap-top. I push this a little by bringing a carry-on bag plus my lap-top in a computer pack which also has room for one video camera, my SLR Camera and an emergency change of clothes (in case all my other luggage is lost). Usually they let me get away with this. Because I trust neither baggage handlers nor TSA inspectors and my luggage has been lost more times than I remember, I pack my other cameras and the majority of my clothes in my other carry on bag so they don't have to be checked. In this bag I also carry a quart of water and some snacks.

You'll want at least one book to read on the flight; your tickets, reservation confirmations, travelers checks, list of phone numbers, spare glasses (contacts and solution) and medications should be put in a water-proof bag in the carry-on bag you intend to hold most tightly to.

Remember that more books, extra batteries, memory cards, video tape or film, masks-fins-snorkels, insect repellant, sun cream, beach towels--all the extra hoopla one might want on a Hawaii vacation--can be purchased at WalMart or Costco on-island as cheaply as the mainland. If you do pack film, and it is in your carry-on, be sure to protect it against x-rays.

Checked Luggage; First, Plan for Your Activities: Know your itinerary and pack only what you need; resist the temptation to toss in all those extra unnecessary items. You may be planning on some particular activities in Hawaii requiring specific gear or clothing--it is best to think this through thoroughly. Many people intend to save money by bringing their own snorkeling gear. This is false economy if it causes you to pay for additional luggage. Buying snorkel gear on island is fairly inexpensive and renting is faster, easier and even cheaper. The same can be said of renting diving gear and golf clubs. Activities such as hiking and horseback riding require a fairly specific wardrobe, but if you plan correctly, you only have to bring your hiking/riding boots and an extra pair of suitable pants and shirt. If you plan on visiting the mountain summits, remember that they can be quite cold--even snowy or rainy--so plan and pack accordingly. If you bring boots, I advise wearing them (and all your other bulky clothing) on the plane to save room and weight in your bags. As for photography gear or musical instruments--any expensive or delicate equipment for that matter--my philosophy is to never turn loose with it. Never check your cameras, your guitar, your laptop, etc--it's a recipe for theft, loss or destruction.

You Need More Suntan Lotion Than You Think...Put it on Before You Go Out in the Sun and Keep Putting It On Throughout The Day.  Likewise, Drink More Water Than You Think You Need...Drink Before You Get Thirsty, When You Get Thirsty and Drink Again After You've Just Had Some Water.  No, Drink Some More--I'm Serious: Photo By Donnie MacGowan
You Need More Suntan Lotion Than You Think...Put it on Before You Go Out in the Sun and Keep Putting It On Throughout The Day. Likewise, Drink More Water Than You Think You Need...Drink Before You Get Thirsty, When You Get Thirsty and Drink Again After You've Just Had Some Water. No, Drink Some More--I'm Serious: Photo By Donnie MacGowan

Next, Plan for the Weather: Being tropical, temperatures at sea level in Hawaii vary only by about 10 degrees between day and night and throughout the year. It's hot during the day, plan a cool wardrobe. The windward side is generally rainy and the "up-country" towns (mountains) frequently can experience afternoon showers. Evenings, particularly up-country, are delightfully cool as there is generally an evening or onshore breeze. With forethought, your wardrobe can cover all these situations without being bulky, heavy or ornate. Remember to pack layers of clothing for warmth, rather than one or two bulky coats and sweaters-this allows for maximum adaptability and a certain amount of built-in variability. This also means that if an emergency hotel-room laundry session is required, your laundry will dry much more quickly.

Don't Forget Some Lightweight Raingear: Photo by Donnie MacGowan

Finally, Specifics: Be efficient--coordinate around a basic, neutral color so everything you bring matches everything else. Black or khaki are the traditional traveler's choices. Dark colors show dirt less than light colors, and this can be a saving grace where doing laundry is impractical. Choose clothes for lightness, packability and washability. Remember that suits in Hawaii are unnecessary; even Circuit Court judges wear Aloha Shirts under their robes here. A nice shirt, generally an Aloha Shirt, and a pair of khakis are the wardrobe of choice at the finer restaurants and nightclubs--everywhere else, it's shorts and sandals. I would advise a basic wardrobe consisting of a polo-style shirt and a couple Aloha Shirts, one pair of long khakis and three pair of shorts, a swimsuit, a couple tank tops or t-shirts, a sunhat and a light jacket for evenings; that's all you really need to cover most bases. Women may want to toss in a light sundress or skirt. Sandals are all you'll need or want in the way of footwear (your feet will be HOT)--you may want to toss in a pair of running shoes for exercise or hiking. Unless you are attending a formal event such as a wedding, don't worry about dressing up or you will not only find yourself carting far too much luggage, but awkwardly overdressed as well.

Be thoughtful about your wardrobe and activities: for instance, you may wish to think about bringing two swimsuits--you will be amazed how pleasant being in the water is in the hot tropics. Whether you are just cooling off in the pool or snorkeling with the turtles and fish, you'll probably want to swim everyday. Swimsuits rarely dry overnight and it's a lot more pleasant to get into a warm, dry suit than a wet, cold one. Also, if you plan on riding horseback or exploring the higher elevations such as Hawaii Volcanoes National Park or Mauna Kea, be sure to bring some jeans and appropriate footwear, a medium weight fleece sweater and light rain jacket/windbreaker. A compact traveler's umbrella is always a good idea.

Don't forget to pack your toiletries and personal items; I used to carry these on, in case of lost luggage, but restrictions on liquids and gels and razors make this impractical. Medications, of course, go in the carry-on. Sun block, sun hat, sunglasses and sun-burn cream (I use an aloe gel) will make your vacation smoother, but can be purchased cheaply locally if you don't quite have room for them.

Brad MacGowan on Kauai...A Tripod is Essential If You Intend To Photograph The Volcanic Eruptions Or Do Any Video Photography: Photo By Donnie MacGowan

Other Things to Bring: Just as an aside, two things you need to be head's up about when you are in Hawaii--if you begin to feel thirsty, you've waited too long to get a drink of water; if you begin to feel the sun, you've waited too long to put sun block on. Drink more water than you think you need, apply sun block before you go out and re-apply more often that you think you need. Your body is used to more moderate climates and won't warn you in time of the danger. In fact, sometimes it's dry enough on the leeward side that you won't even feel yourself sweat—it evaporates before you get wet. So remember to keep drinking water—alcohol, coffee and ice tea (as well as caffeinated sodas) are both diuretic and vasodilatory, so are counterproductive to keeping hydrated. Drink water. Lots and lots of water. Although bottled water is abundantly available, being a thrifty traveller, I always bring my own reusable water bottles. These may be carried on, but you need to take them through Security Screening empty, filling them at a water fountain before boarding—this also allows you to have water to drink during the flight, remembering that tap water on some airlines has proven to be unsafe.

Many people plan ahead by leaving ample room in their luggage to bring back souvenirs and gifts; recent luggage restrictions are making this impractical. Rather than buying new outfits for my trip, I spend the week before my trip weeding through my wardrobe, packing one very nice set of clothes and the remainder are items that were already bound for the thrift store. Thus, I simply abandon them at the end of my stay and thereby have more than enough space in my luggage for anything I buy. Remember—Hawaii is part of the US and the U.S. Postal Service sells flat-rate, pre-paid, boxes for very inexpensive rates. Ask for "Flat Rate Shipping Boxes" and ship those gifts home safely, cheaply and with no fuss on your part.

You should toss in a small fanny pack or day-pack for day trips...it's amazing how many things you find you need to carry around during the day (sunscreen, water bottles, guidebook, camera, small purchases) and a pack helps to keep them organized and in hand. A small pack can also double as a laundry bag on the flight home.

A Small Pack Come In Very Handy For Keeping Your Stuff Together and Right At HAnd: Photo by Donald MacGowan
A Small Pack Come In Very Handy For Keeping Your Stuff Together and Right At Hand: Photo by Donald MacGowan

Although this is not the time for a discussion of vacation photography in general, let me say a few words about cameras. This is Hawaii for pete's sake, one of the most beautiful places on earth! You are going to want to take pictures while you are here, you are going to wish you had taken pictures all the long years down the road after you return. You do not have to be like me, packing two video cameras, a digital SLR and a digital underwater camera; even if you are not camera savvy at all, there are easy alternatives.

Simplest by far, and not terribly expensive, are pre-loaded, disposable film cameras. Available for $5-10 each, and costing about the same for film developing, these are the most basic point-shoot-enjoy photographic choice. There are even disposable underwater cameras if you plan on any swimming, kayaking or snorkeling. May I suggest that you have your film developed in Hawaii—WalMart, KMart and Costco all have 1-2 hour processing at reasonable prices. The color balance in Hawaii, because of its equatorial position (angle of sun and thickness of atmosphere) and the richness of the colors of flora, land and sea, is different to what most film-processing shops know and thus, if you wait until you return home to develop the film, the colors will turn our disappointingly. Getting your film processed on island also allows you to share prints with people you meet or are visiting.

Digital cameras may at first seem confusing, but are really much easier to deal with than film cameras, have such great storage capacity that they quickly pay for themselves in film and processing costs and produce images that, even for the rank beginner, are startling and gorgeous. You don't even need a computer to enjoy your digital pictures, just take them to any film processing shop and they'll make prints for you—much more cheaply than prints from film. If you plan to buy a digital camera for the trip, or are not quite used to the one you have, start practicing with it about a month before you leave...standing with your arm around your lover in the perfect sunset, with the palm trees swaying, the hula girls dancing on the beach and the humpback whales leaping in the ocean (oh, yes, these scenes DO happen!) is not the time to be fiddling with camera and instruction booklet trying to figure out how the damn thing works. Secondly, be sure to bring that instruction book, all accessory cords, chargers and adapters in a small plastic baggie when you come—they are expensive to buy on vacation and you never know what you'll need. Experience will teach what you can leave behind on successive trips. If buying a new digital camera to immortalize your trip to Paradise, think about getting a waterproof version. Most major camera manufacturers produce fine, submersible cameras, good to 40 feet or so, that are every bit as good as the regular cameras and are not very much more expensive. Many also have video features that allow you to take brief video clips, even underwater. One final note on your camera—never let go of it. Keep it in your carry-on bag during the flight, in your pocket or you day pack on the trip, do not leave it in your rental car or your hotel room or lunch table. Ever.

Amanda, Liz and Amy Maus Pose for the Underwater Camera: Photo by Donald MacGowan

Finally, one of the most enduring visions I have of travel is standing exhausted, late night at the luggage carousel as hordes of weary travelers lift first one anonymous piece of black luggage, then the next, searching for their own amongst a sea of ubiquitous black nylon and leather travel bags. Not everyone is comfortable carrying the bright Hawaiian print luggage I have (although I always instantly recognize my bags...except when returning to Hawaii where EVERYBODY has this luggage), but there are ways to customize and personalize your bags. One of the more common, and therefore useless, is the nylon rainbow-colored strap...there are almost as many of these wrapped around the anonymous black luggage as there are plain black bags themselves. Airlines don't like straps and cords flopping around off the luggage, for obvious reasons, but you can buy colorful and unique baggage tags or tie a bit of uniquely colored ribbon or a small scarf to the handle of your luggage...just something that screams “Mine!” to you as it slides down onto the carousel so you do not have to search plaintively through the weary lot of black bags with rainbow belts on them.

The MacGowan Family Deplanes From Airforce 1--Even Traveling in Style Your Luggage Can Get Lost So Plan Ahead: Photo by Donald B. MacGowan

This is Hawaii, remember? You came to have fun!

For more information on traveling to Hawaii in general, or touring the Big Island in particular, please also visit www.tourguidehawaii.com and www.lovingthebigisland.wordpress.com. Information about the author can be found here.

All media copyright 2009 by Donald B. MacGowan
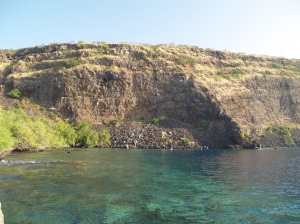

Wednesday, May 20, 2009

Hawaii Island Snorkeling Tips, Part III: Reef Etiquette

Coming to my island for a vacation? There are three things I always recommend the first-time visitor do. First, get in the air. Secondly--go to a luau. Finally, I advise people of every age to get in the water and go snorkeling. You will find your mind going back to that experience over and over through the years much more so than many of your other travel experiences. Part I of this series discuses Snorkeling Gear; Part II of this series will discuss Snorkeling Technique and Part III will cover Snorkeling Safety; Part V of the series will cover snorkel spots on the Big Island.

Photo by Donald MacGowan
Gary Burton and his duaghter snorkel at Hounaunau Bay: Photo by Donald MacGowan

Now, let's talk a moment about snorkeling etiquette and protecting the reef and the animals who live there.

Please do not feed the fish, it disrupts their natural feeding habits and you may be injured. Reef fish are territorial and do occasionally "nip" but you should not chase, harass or touch them (this includes octopi). The oils on your fingers will injure their skin and they may carry diseases which they can pass to you on your hands. For photographing reef fish, whether snorkeling or scuba diving, simply find a feeding spot (usually a boulder or dead coral head teeming with algae, and wait calmly and silently nearby. They will slowly begin to check you out and if you can remain still long enough, eventually surround you leading to excellent photos and a very memorable experience.

Snorkeling etiquette calls for protecting not only the reef animals, but also the fragile corals growing on the reef. Corals, actually colonies of very small animals, take hundreds of years to form the structures visible today; they feed, shelter and provide habitats for other reef animals. Coral reefs also protect the lagoons and shoreline from waves and sand erosion. Corals are at the very root of Hawai'ian history and culture; the Hawaiian creation chant places the origin of life in the sea, beginning with a coral polyp.


Simply touching corals to see what they feel like can cause the death of an entire colony. Oils from your skin can disturb the delicate mucous membranes which protect the animals from disease. Please don't walk upon or stand on coral, as this can kill the living coral polyps which, as the builders of the entire reef structure, are the very foundation of the reef ecosystem. Sunscreen washing off your body can kill coral; wear a t-shirt and a swim cap for UV protection and put your sunscreen on AFTER you come out of the water.

Called Honu by Hawaii's natives, the Hawaiian Green Sea turtle is beautiful, serene and seeming wise. Though they have swum the oceans for over 200 million years, peacefully feeding on algae and invertebrates, this highly successful product of amphibian evolution is in grave danger. Loss of habitat, hunting and molestation by humans has conspired to push the Hawaiian Green Sea Turtle to the very verge of extinction.


Photo by Donald MacGowan
Hawaiian Green Sea Turtle at Papakolea Beach: Photo by Donald MacGowan

Protected now by state and federal law, the population of once millions of individuals has been decimated to just a few hundred thousand; although they are making a comeback, Hawaii's honu are still very much endangered.

Do not approach basking turtles closely, never touch or pick them up. Harassing turtles carries a stiff fine and in any case, touching the turtle is a good way to get a raging salmonella infection. If honu are swimming near where you are, do not approach or chase them; always swim to the side of them, never above (as a predatory shark would) nor below them (so they won't feel that their soft belly is at risk).

Anyone who observes their beauty and grace underwater easily understands why the Hawai'ians base their word for "peace", "honua", on their name for the green sea turtle, "honu".

Although harder for the snorkeler to approach, but certainly no less in danger of molestation are the marine mammals: dolphin, seals and whales. In general, it is illegal, dangerous and generally a bad idea to approach marine mammals within 100 yards; 300 yards for females with calves. Dolphins and seals, in particular, may choose to approach you-just remember, this ain't "Flipper"-these are wild animals and they bite. Hard. If approached, remain calm (absolutely entranced, of course, but calm); do not approach any young animals and do not reach out to them as they may interpret this as aggression on your part and possibly bite. Male seals may exhibit dominant behavior and have been known to *ahem* mount swimmers. Avoid these unpleasantries by observing and enjoying these animals from a distance. About whales…uh, wait a minute…if there is anybody out there crazy enough to swim out into the open ocean and harass a 60,000 pound animal with a mouth twice the size of a king-size bed, nothing I say is going to stop them…just use some common sense, OK? Leave them alone—besides…it’s the law.

And now a word about sharks--two words, actually: "Don't Worry". There's good news and bad news about sharks in Hawaii--first the bad news: if you are in water deeper than your knees, you are probably within 200 yards of a shark. The good news? You will never know it. The truth is that you are not likely to see or encounter a shark…period. Tens of millions of people swim Hawaii every year without seeing so much as a dorsal fin break the water. Don't worry--you are not what they eat (so you won’t attract them) and generally, they are more afraid of you than you are of them. To dispel visitor's apprehensions about sharks, the Hawaiian Tourism Bureau used to advertise that tourists were more likely to get hit on the head by a falling coconut than bitten by a shark…but they decided THAT was not a real cheery statistic to crow about, either. In reality, there are only about three shark bites a year in Hawaii—which is amazing considering there are hundreds of thousands of people in the water, all day, every day of the year.

Photograph by Donnie MacGowan
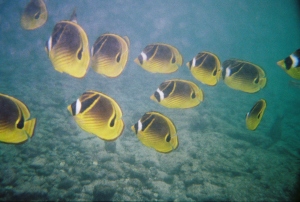
A cloud of raccoon butterfly fish at Kahalu'u Beach: Photograph by Donnie MacGowan

Having said that, bear in mind that all sharks demand respect and there are several things you can do to make yourself generally safer in any shark encounter. Number one safety tip is: avoid them. Sharks are stealth hunters and in any conditions where they are obscured in the water, they will hunt. Therefore--do not go into the water until at least an hour after dawn, be out of the water by about 4 pm; do not enter the water if it is murky; avoid stream mouths. Obey beach closures; obey warnings from the Lifeguards. Little sharks don't get to be big sharks unless they pay strict attention to avoiding whoever is bigger than they are--small sharks generally will glide silently away from you without you ever having known they were there. Big sharks are different. They may approach you.

The most common conventional wisdom you hear is: if you are being stalked or approached, swim purposefully, not panicked, away from the shark at an angle. Do not swim at high speed straight from him, it will trigger his predator-prey response and he’ll chase you. Do not splash excessively; this sounds like a dying fish (i.e., dinner) to sharks. Remember that the larger sharks eat sea turtles…to a shark hunting below you, your outline paddling on a surfboard or boogie board, looks remarkably like a sea turtle. When you approach the water, seeing three or four sea turtles sunning themselves on the beach is normal; seeing twenty or thirty indicates that something very large and hungry is hunting the water nearby. The presence of dolphin nearby is no guarantee there are not also sharks nearby.

There are hundreds of bits of advice for surviving shark attacks from hundreds of shark experts and attack survivors from all over the world—I will not pass these on to you for two reasons. First and foremost, I am a not a shark expert; secondly, I have never needed any of them because I have followed these sensible rules for years and have never, not once, seen a shark while snorkeling. I’m out there 4 or five days a week, year round. You won’t see one either. Relax and enjoy your snorkeling…as I said…don’t worry.

Finally--many people ask "What's the etiquette for, um--er--answering nature's call?" Easy--for wet stuff, just swim a bit away from people and let go, maybe maintaining forward momentum so as not to create a "cloud". No, this isn't why the ocean is salty. For solid stuff, get your partner and both of you swim in and get out, visit the rest room. No exceptions for that.

Part I of this series discuses Snorkeling Gear; Part II of this series will discuss Snorkeling Technique and Part III will cover Snorkeling Etiquette; Part IV of the series covers Snorkeling Safety; Part V will cover Big Island Snorkel Spot and Part VI covers Wilderness Snorkeling.

A short video on this topic is available here.

For more information on traveling to Hawaii in general, and beach activities on the Big Island in particular, visit www.tourguidehawaii.com and www.lovingthebigisland.wordpress.com. For information about the author, go here.

All media copyright 2009 by Donnie MacGowan

Monday, May 18, 2009

Hawaii Island Snorkeling Tips, Part II: Technique

By Donald B. MacGowan
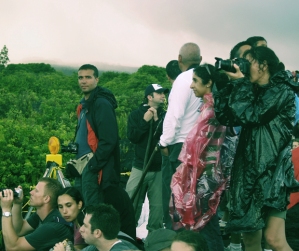
Photo by Donnie MacGowan
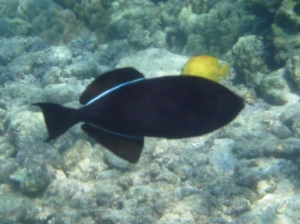
Donnie MacGowan Snorkeling at Kahalu'u Beach on the Big Island of Hawaii: Photo by Donnie MacGowan

Coming to my island for a vacation? There are three things I always recommend the first-time visitor do. First, get in the air. Secondly--go to a luau. Finally, I advise people of every age to get in the water and go snorkeling. The "one-one-one, experiencing the world through the fishes' eyes" magic of swimming in those bath-warm lagoons surrounded by clouds of tropical fish is an amazing, restful and restorative pursuit-you will find your mind going back to that experience over and over through the years much more so than many of your other travel experiences.

Part I of this series discuses Snorkeling Gear; Part II of this series will discuss Snorkeling Technique and Part III covers Snorkeling Etiquette; Part IV of the series covers Snorkeling Safety. Part V will cover Big Island Snorkel Spots and Part IV covers wilderness snorkeling.

Part II: Let's talk about technique: how are we going to do this?

Before getting into the water, where is your partner? Never snorkel alone; never get more than 20 feet from your partner. Memorize the color of your partner's mask and snorkel…this is how you will recognize him from a distance in the water.

Photo By Donnie MacGowan
Bart Hunt Filming Fish at Kahalu'u Beach: Photo By Donnie MacGowan

Also before getting wet, you should make sure your mask is clean and that you have applied some form of defogger to it, either the commercially available solution (DO NOT get this stuff in your eyes!) or by simply rubbing some spit over the insides of the lenses. Pull the mask on your head, leaving it perched up on your hair as you enter the water. You should enter the water on a sandy patch of beach that does not drop off too steeply and is not in an area attacked by large waves.

Do not put your fins on before you are in the water. After wading out until the water is between knee and waist deep, face the incoming waves, sit down (this will also help you adjust to the temperature of the water--sometimes a bit of a shock but soon you get used to it) and pull your fins on. Remember: never turn your back on the ocean.

From this position, duck your head under and get your hair and face wet (to help the mask seal). Now stand up and pull the mask down, arranging hair, strap and snorkel mouthpiece to maximize the seal integrity and personal comfort. This may take some adjusting to get all the hair out from under the seal, to get the snorkel mouthpiece in the right position and get comfortable. Don't worry if there is a little fog on the mask at this point. Be sure the strap from the mask rises up over the ball of your head, not over your ears.

When the mask is sealed and you feel ready, bend at the knees, stretch arms forward and lean forward slowly until you are floating. Kick rhythmically, steadily, but at a pace you can keep up for some time. See? IT'S FUN! Oh, wait--don't forget to breath! Seriously, some people may feel a little claustrophobia at first with the mask and snorkel, and in chilly water it's natural to have short, gaspy breathing by instinct. Relax, concentrate on taking slow, even breaths. Snorkeling is relaxing, to be sure, but you have to be relaxed to snorkel. Breathe. Smoothly, rhythmically. Breathe.

Many people find they breathe and move more efficiently with their hands clasped behind their backs. Use your hands in sweeping motions to turn, or back up or fend-off too-near snorkelers, then clasp them back behind you again for cruising. Again, breathe. Smoothly, rhythmically.

If at any point you feel uncomfortable, simply stop, tread water (or stand up in the shallows), and put your mask up on top of your head. Look around you. See? It's easy! But never, ever remove your mask all the way while in the water--you could drop it or it could be taken by a wave and then you'd be having significantly less fun, really quickly. If there is fog in your mask, pull your mask away from your face just a fraction of an inch and just for a moment while under water to allow just a little bit of water in. Pull your head out of the water, allow the water in the mask to rinse away the fog, then tilt the mask away from your face just a moment again to drain the water out. Practice this in a place you feel comfortable. When you get good, you can do this without even stopping--this technique also allows you to clear your mask of leakage (and all masks leak a little) while on the go.

What's that gurgling noise? Occasionally, especially if the surf is up or you are diving, water gets trapped in the snorkel. You can purge the snorkel simply by exhaling strongly through it and blowing the water out the top, or more easily by lifting your head above water, spitting out the mouth piece and allowing it to dangle in the air and drain clear. Cake.

Poke your head out of the water frequently to check that your partner is within 20 feet of you and to keep yourself oriented relative to your entry and exit places. Stay alert--it's easy to loose track of time, get carried farther than you thought by a current you didn't even notice, wander out of your comfort zone, lazily paddle away from your partner, accidentally stray into a dangerous zone. So stay focused, stay oriented, always know where you are, where your partner is.

Photo by Donald MacGowan
Amanda Maus Snorkeling at Kahalu'u Beach: Photo by Donald MacGowan

Gosh, what's that down there on the bottom? Diving is what snorkeling is all about. Do not expect to go deeply; do not expect to stay down long; err on the side of safety, be conservative in your actions. The ocean is composed of stacked layers of water, frequently of surprisingly different temperatures and salinities, sometimes distressingly moving in different directions. It is entirely possible to be swimming in quiet water, dive a half dozen feet under the surface and find yourself caught by a current you didn't even know existed…don't fight it, but turn and kick to the surface immediately so you can evaluate this new wrinkle while catching your breath.

To dive efficiently, start off by floating flat, face down, on the water. Fill your lungs and empty them completely a few times to charge your blood with oxygen. One more big breath in, then let half out (a lung-full of air will make you floaty and keep you from diving very deeply); with your arms forward, pointing down at your target, bend at the waist, kick once then lift your feet in the air, allowing the weight of your legs to push you under. Keep kicking as you submerge. Do not over estimate the depth you can dive or the time you can spend down. Learn your limits slowly and safely. Uncomfortable? Turn quickly and kick to the surface, breathe, rest, try it again.

Water pressure on the eardrums will make your ears ache in just a few feet of water; to alleviate the pain and adjust the pressure in your head, as you dive pinch your nose, close your mouth and "blow" to pop your ears. If pain, discomfort, dizziness or other distress continues, turn and kick to the top. Stay there for the duration of your swim.

Where are all the fish? The water near shore may be murky from fresh-water springs, lots of people wading or surf action; swim out a little until the water gets crystal clear…that's better. Although you will likely see large swarms of fish swimming about all over the bay, remember they live along the rocks and coral and not over sand, so that's where the most interesting stuff is. Check out cliffs, ledges, pockets and boulders. Look closer. You can get a cheap, disposable underwater camera for less than ten bucks at WalMart--it may be the best $10 you spend on your whole trip. Get two. Don't forget to take pictures of each other, too.

Before you get tired, before you feel your back getting sunburned, before you shoot the last picture, before the wind comes up or the surf builds, it's time to get out. Don't push it, the ocean plays for keeps and it never gets tired. Remember your plan; where's your sandy exit point? Swim toward it; keep swimming until you are in about the same depth of water where you put your fins on--it's easier to stand up from a floating position in about navel-deep water. Keep your eye on the ocean as you walk out onto the beach. Wasn't snorkeling amazing? Wait'll you see those pictures!

After getting out, trust me, you are going to want to rinse yourself off--the ocean salt is really irritating to your skin as you dry off. You also need to thoroughly rinse your gear--the salt attacks and destroys the rubber and plastic. If there are not showers or any way to rinse off where you are snorkeling, you should bring a jug of water (about one gallon per person for body, hair and gear will do it) to do this. No, no, you really, really will want to rinse off after, I promise.

Photo by Donald MacGowan
Humuele'ele at Honomalino Bay, Big Island, Hawaii: Photo by Donald MacGowan

Part III of this series will discuss snorkeling etiquette; Part IV will discuss snorkeling safety, Part IV will discuss the best places on the Big Island to go snorkeling and Part VI will discuss wilderness snorkeling.

To see a video covering many of these topics, go here. For more information on traveling to Hawaii in general, and beach activities on the Big Island in particular, visit www.tourguidehawaii.com and www.lovingthebigisland.wordpress.com. For information about the author, go here.

All media copyright 2009 by Donald B. MacGowan; all rights reserved.


Casino Bonus no Deposit